Back to Integrations
integrationWebhook node
integrationJira Software node

Webhook and Jira Software integration

Save yourself the work of writing custom integrations for Webhook and Jira Software and use n8n instead. Build adaptable and scalable Development, Core Nodes, and Productivity workflows that work with your technology stack. All within a building experience you will love.

How to connect Webhook and Jira Software

  • Step 1: Create a new workflow
  • Step 2: Add and configure nodes
  • Step 3: Connect
  • Step 4: Customize and extend your integration
  • Step 5: Test and activate your workflow

Step 1: Create a new workflow and add the first step

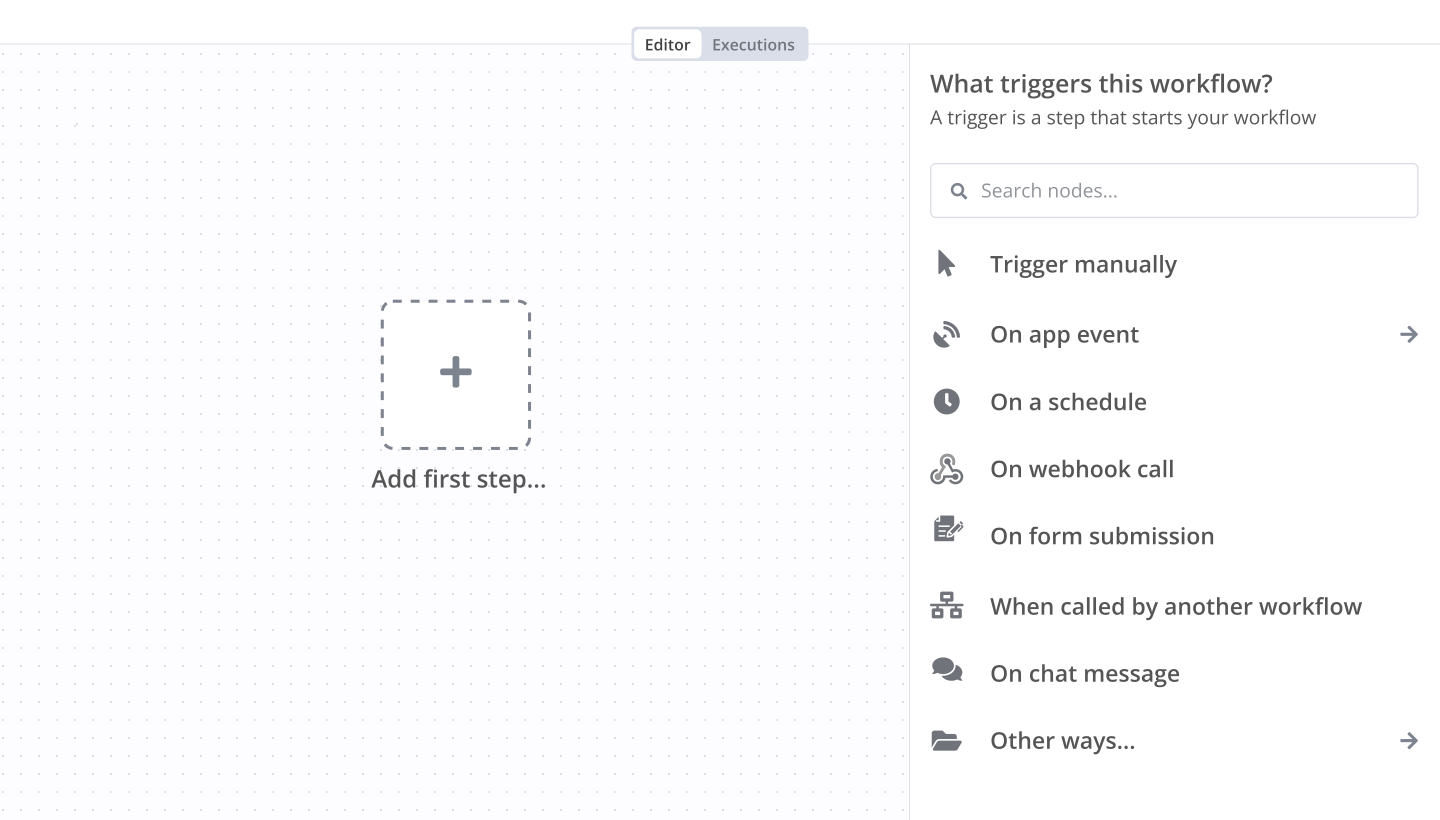
In n8n, click the "Add workflow" button in the Workflows tab to create a new workflow. Add the starting point – a trigger on when your workflow should run: an app event, a schedule, a webhook call, another workflow, an AI chat, or a manual trigger. Sometimes, the HTTP Request node might already serve as your starting point.

Webhook and Jira Software integration: Create a new workflow and add the first step

Step 2: Add and configure Webhook and Jira Software nodes

You can find Webhook and Jira Software in the nodes panel. Drag them onto your workflow canvas, selecting their actions. Click each node, choose a credential, and authenticate to grant n8n access. Configure Webhook and Jira Software nodes one by one: input data on the left, parameters in the middle, and output data on the right.

Webhook and Jira Software integration: Add and configure Webhook and Jira Software nodes

Step 3: Connect Webhook and Jira Software

A connection establishes a link between Webhook and Jira Software (or vice versa) to route data through the workflow. Data flows from the output of one node to the input of another. You can have single or multiple connections for each node.

Webhook and Jira Software integration: Connect Webhook and Jira Software

Step 4: Customize and extend your Webhook and Jira Software integration

Use n8n's core nodes such as If, Split Out, Merge, and others to transform and manipulate data. Write custom JavaScript or Python in the Code node and run it as a step in your workflow. Connect Webhook and Jira Software with any of n8n’s 1000+ integrations, and incorporate advanced AI logic into your workflows.

Webhook and Jira Software integration: Customize and extend your Webhook and Jira Software integration

Step 5: Test and activate your Webhook and Jira Software workflow

Save and run the workflow to see if everything works as expected. Based on your configuration, data should flow from Webhook to Jira Software or vice versa. Easily debug your workflow: you can check past executions to isolate and fix the mistake. Once you've tested everything, make sure to save your workflow and activate it.

Webhook and Jira Software integration: Test and activate your Webhook and Jira Software workflow

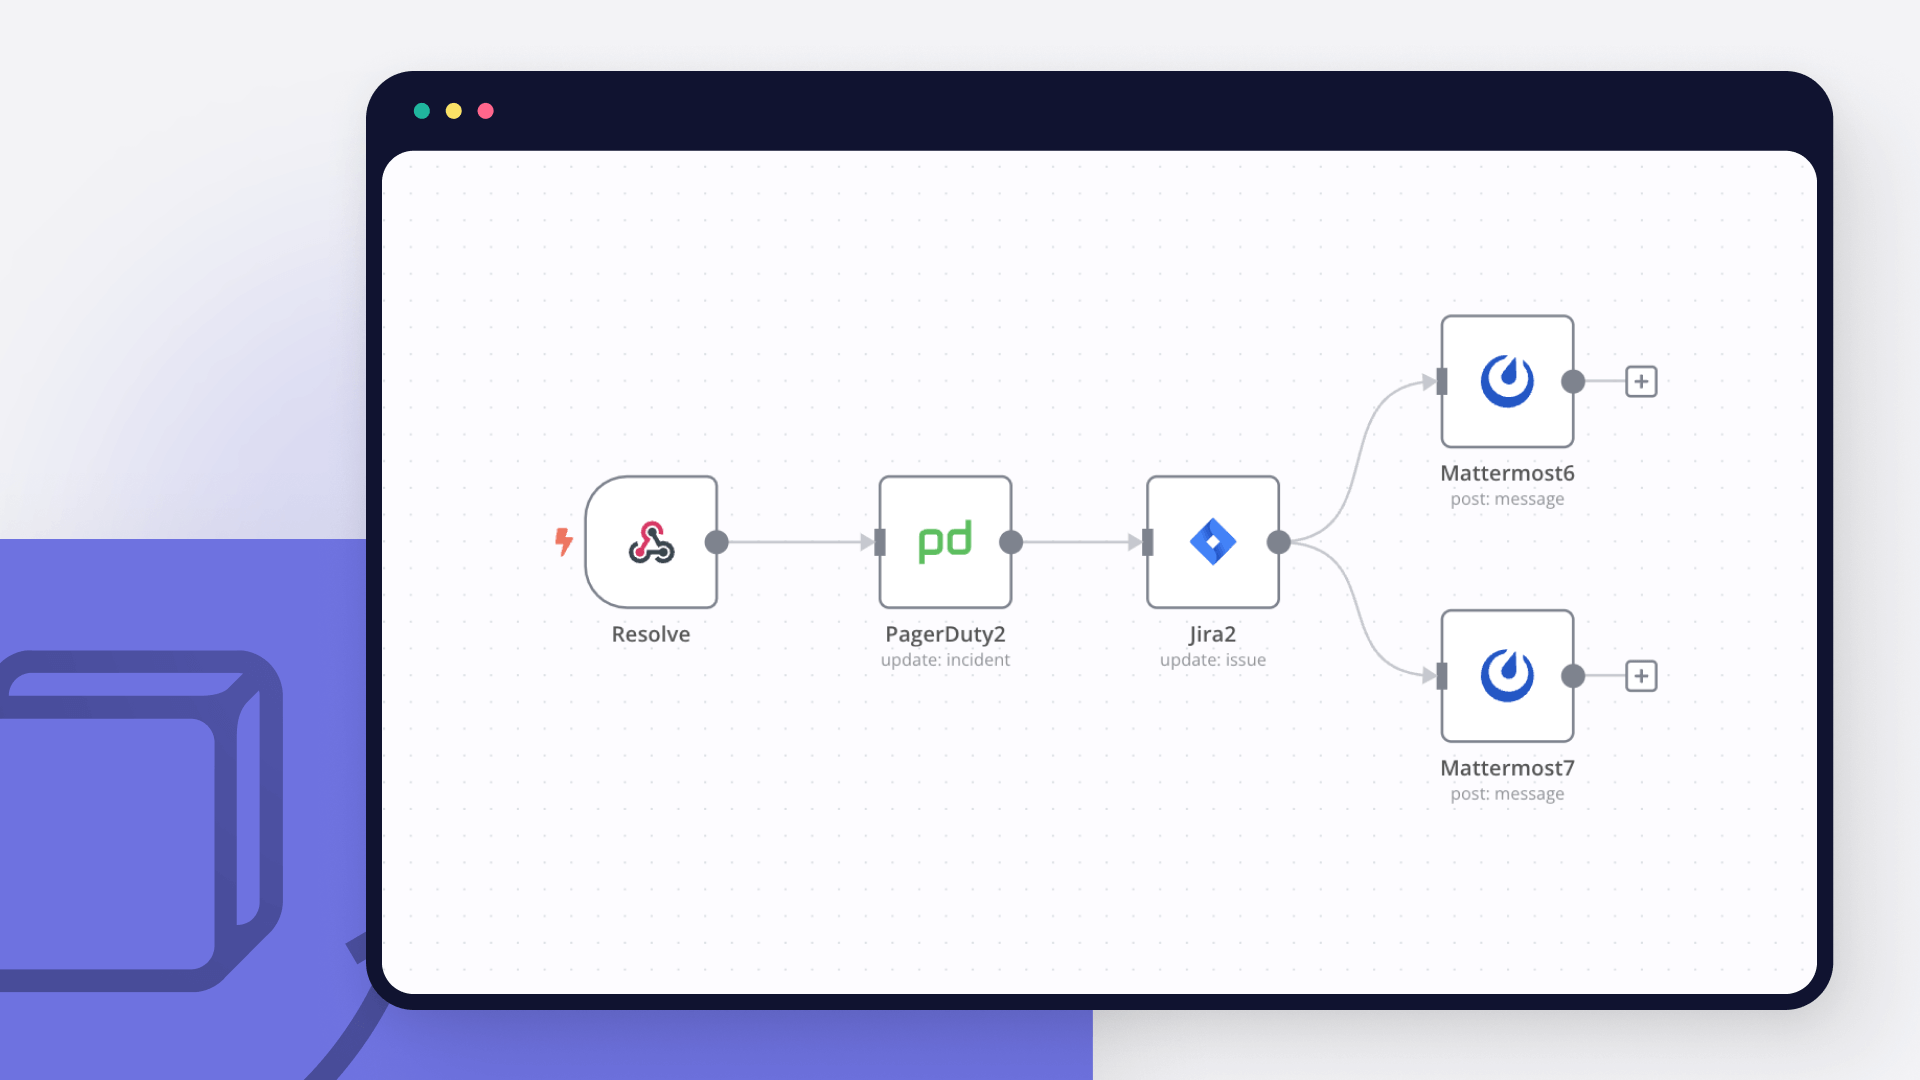
Manage custom incident response in PagerDuty and Jira

This workflow automatically follows the steps in a custom incident response playbook and manages incidents in PagerDuty, Jira tickets, and notifies the on-call team in Mattermost.

This workflow consists of three sub-workflows, each automating specific steps in the playbook. Read more about this use case and learn how to set up the workflows step-by-step in the blog tutorial How to automate every step of an incident response workflow.

Prerequisites

A PagerDuty account and credentials
A Mattermost account and credentials
A Jira account and credentials

Nodes

Webhook nodes trigger the workflows when an incident is created in PagerDuty, and when the incidedent is acknowledged and resolved.
Mattermost nodes create an auxiliary channel for the on-call team to discuss the incident with buttons to acknowledge the incident and mark it as resolved.
PagerDuty nodes update the status of the incident.
Jira nodes create an issue about the incident and update its status when it's resolved.

Nodes used in this workflow

Popular Webhook and Jira Software workflows

+4

Generate continuous PRD updates in Google Docs from Slack, Zoom, Jira, Zendesk, Figma and analytics using OpenAI

This workflow creates an automated Product Intelligence Engine that continuously collects signals from multiple product sources and generates structured PRD updates using AI. It ingests conversations, feedback, support tickets, analytics, and design comments, standardizes them, analyzes them with an AI PRD Agent, and automatically updates a Google Doc with structured PRD recommendations. Instead of manually reviewing Slack threads, Zoom calls, Jira comments, support tickets, and customer forms, this workflow centralizes everything into one intelligent PRD analysis system. High-Level Architecture - The workflow runs in 4 layers: Signal Ingestion Layer Captures product signals from: • Slack (channel messages + app mentions) • Customer Form submissions • Zoom recordings (scheduled) • Jira comments (scheduled) • Zendesk tickets (scheduled) • Figma comments (file updates) • Platform analytics via webhook • (Extendable to Salesforce / HubSpot) Standardization Layer Each source passes through a Format Node that: • Extracts relevant text • Normalizes metadata • Adds timestamps • Labels source type All inputs are converted into a unified "product signal" object. Intelligence Layer (AI PRD Agent) All signals are merged into a single stream using a Merge node. The PRD Analysis Agent then: • Extracts feature requests • Detects scope changes • Identifies risks and constraints • Evaluates priority signals • Detects target user shifts • Generates structured PRD updates PRD Governance Layer - output in a Google Doc The structured AI output is appended to a Google Doc, which is fully traceable. This creates a living PRD that continuously evolves based on real product signals. Required Credentials (And How To Add Them): You will need to configure the following credentials in n8n: Slack Used for Slack Trigger. Steps: Create a Slack App at api.slack.com Enable: app_mentions:read channels:history chat:write (optional if you want replies) Install app to workspace Copy Bot OAuth Token In n8n → Create Slack API credential Paste token Reference - https://www.youtube.com/watch?v=qk5JH6ImK0I Zoom (OAuth2) Used to fetch recordings. Steps: Create an OAuth App in Zoom Marketplace Add the Redirect URL from n8n Copy Client ID + Secret Add Zoom OAuth2 credential in n8n Connect account Reference - https://www.youtube.com/watch?v=BC6O_3LYgac Google Docs (OAuth2) Used to update PRD document. Steps: Create Google Cloud Project Add Doc URl to n8n Replace the example Google Doc URL with your own PRD document. Reference - https://www.youtube.com/watch?v=iieEHvu93dc Jira (Cloud) Steps: Generate API token from Atlassian Create Jira Software Cloud credential Enter: Email API token Domain Reference - https://www.youtube.com/watch?v=T4z7lzqSZDY Zendesk Steps: Generate API token Add Zendesk credential Enter: Subdomain Email API token Figma Steps: Generate a personal access token in Figma Add Figma credentials with the team ID Paste token Platform Analytics Webhook Replace: <PLACEHOLDER_VALUE__your_analytics_api_endpoint> With your real analytics endpoint. You can: • Send Mixpanel exports • Send Amplitude exports • Or POST custom JSON What Makes This Powerful • Eliminates product signal silos • Creates AI-driven PRD governance • Ensures traceability of decisions • Enables continuous PRD evolution • Scales across teams

Generate AI matte painting video variations with Seedance for VFX review

📘 Description This workflow is a fully automated AI matte painting generation system for VFX pipelines, designed to convert a single environment prompt into multiple cinematic background variations. It handles generation, validation, multi-variant rendering, compositing preparation, review workflows, and final delivery—eliminating manual coordination between artists, supervisors, and production systems. ⚙️ Step-by-Step Flow The process begins with a webhook trigger that serves as the shot request intake layer, receiving a POST request containing the environment prompt, shot code, optional plate image URL, and metadata such as project, sequence, and supervisor details. This input is then passed through a validation and normalization stage, ensuring all required fields are present while standardizing elements like sequence codes, project IDs, Slack channels, and timestamps. Once validated, the system fans out the request into four distinct cinematic variations—day (overcast realism), dusk (golden hour lighting), night (moonlit cinematic), and fog (atmospheric depth)—with each variant assigned a custom-engineered prompt. At the core of the workflow, a dynamic mode selection logic determines whether to use image-to-video generation (if a plate image is provided) or text-to-video generation (if no reference is available), while also configuring parameters such as audio generation, aspect ratio, and duration. Each variation is then submitted as an independent job to the Seedance API for AI video generation, returning unique job IDs for tracking. A polling loop handles asynchronous processing by checking the status of each job every 20 seconds until all reach a “succeeded” state, operating independently per variation. Once completed, the system constructs detailed metadata for each asset, including video URL, atmosphere type, variant ID, resolution, duration, and tags such as AI-generated and review status. In parallel, it generates an auto-configured Nuke compositing template with pre-built nodes for plate input, AI background, merge setup, color grading placeholders, and output writing. For production tracking, a Jira review task is created for each variation, while all assets are logged within the ClickUp system. An aggregation layer then consolidates all four variations into a single structured summary, formatted for seamless Slack delivery. A Slack notification is sent to the supervisor with the complete review package, including links to all variations, Jira tickets, inline Nuke scripts, and associated metadata. Finally, the system downloads the generated video assets and completes the workflow by sending an email to the requester with the video attachments and full production context, ensuring a smooth end-to-end delivery pipeline. 🚨 Error Handling • Global error trigger • Instant Slack alert • Prevents silent failures across pipeline 🧩 Prerequisites • Seedance API (video generation) • Slack OAuth2 • Gmail OAuth2 • Jira Cloud • ClickUp API • Webhook integration (input system) 💡 Key Benefits ✔ Parallel generation of multiple cinematic variations ✔ Automatic decision between image-to-video vs text-to-video ✔ Built-in compositing (Nuke script auto-generation) ✔ Full production pipeline (generation → review → delivery) ✔ Async-safe with polling loop ✔ Centralized asset tracking (Jira + ClickUp) ✔ Zero manual VFX coordination 👥 Perfect For VFX studios Film/TV production pipelines AI-driven matte painting workflows Previsualization teams Creative automation systems

Triage Microsoft 365 incidents into Jira with GPT-4o-mini, PagerDuty and Teams

Manual incident triage kills your MTTR. This workflow automates the first response so your engineers get actionable tickets instead of raw alerts. This workflow takes unstructured incident reports from Microsoft 365 and turns them into structured Jira tickets with severity, affected systems, root cause hypothesis, and recommended actions. It analyzes impact, routes critical failures to PagerDuty, and posts clear summaries to Teams. How it works The workflow operates in four synchronized stages: The workflow runs in four stages: Reliable ingestion: Webhook triggers and returns 202 Accepted immediately. This prevents the source system from timing out or sending duplicate retries while the AI processes the data. Security and deduplication: Validation: Checks webhook signatures and sanitizes input to block prompt injection. Idempotency: Compares incident ID against a 1,000-event rolling window in staticData. No duplicate tickets for the same issue. AI analysis: GPT-4o-mini analyzes the report. Extracts a title, assigns severity (P1-P4), identifies affected systems, generates root cause hypothesis and next steps. The Parse & Enrich node catches malformed AI output and fails gracefully into a "Manual Review" state. Orchestrated response: Ticketing: Creates a Jira Incident with mapped priorities and triage labels. Escalation: Triggers PagerDuty for P1 and P2 incidents only. Visibility: Posts an Adaptive Card to Teams with summary and direct link to the Jira ticket. Key Benefits Async handshake: 202 response prevents webhook timeout issues with Microsoft 365 and Teams. Deduplication: Idempotency gate blocks duplicate alerts from flooding your ticketing system and on-call engineers. Actionable output: Engineers get likely root cause and suggested actions, not just "system down" alerts. Audit trail: Every execution logs structured data for tracking AI accuracy, execution time, and incident patterns. Setup Steps [ ] Credentials: Add credentials for OpenAI (LangChain), Jira Software, PagerDuty, and Microsoft Teams. [ ] Environment Variables: Define WEBHOOK_SECRET, JIRA_PROJECT_KEY, JIRA_DOMAIN, PAGERDUTY_SERVICE_ID, and PAGERDUTY_EMAIL. [ ] Jira Config: Ensure your Jira project has the "Incident" issue type enabled and the priority levels match (Highest, High, Medium, Low). [ ] Webhook Link: Copy the n8n Production Webhook URL and paste it into your Microsoft 365 outgoing webhook settings or Teams app configuration. Who this is for SRE & DevOps Teams:** Need to cut alert noise and automate first-line incident response. IT Operations Managers:** Want audit trails for incident handling (SOC 2 compliance). Managed Service Providers (MSPs):** Offering AI triage as a service to enterprise clients. Required APIs & Credentials ITSM & Alerts:** Jira Software, PagerDuty. Communication:** Microsoft Teams. AI Provider:** OpenAI (GPT-4o-mini). How to customise it Adjust Severity Logic:** Modify the "Severity Guide" in the AI Brain prompt to match your company's specific SLAs. Swap Ticketing Systems:** Replace the Jira node with ServiceNow, Zendesk, or GitHub Issues. Add Post-Mortem Prep:** Add a branch to automatically create a dedicated Slack or Teams channel and a Zoom/Teams bridge for P1 incidents. Local LLM Option:* Swap the OpenAI node for Ollama* if you prefer to run triage on your own infrastructure for maximum data privacy.

Classify sentiment of incoming text using Hugging Face, Google Sheets, and Jira

Sentiment Analysis Workflow using Webhook, Hugging Face, Google Sheets & Jira This workflow automatically analyzes incoming text feedback, classifies it into Positive, Neutral or Negative using a Hugging Face sentiment model, stores results in Google Sheets and creates Jira tickets for negative feedback. Quick Steps to Get Started Import the workflow into your n8n account Set up Webhook endpoint (/sentiment-input) Add Hugging Face API token in HTTP Request node Configure Google Sheets (3 tabs: Positive, Neutral, Negative) Connect Jira credentials Activate the workflow Send POST request with text data What It Does This workflow automates sentiment analysis of incoming text data using a machine learning model hosted on Hugging Face. It receives multiple text inputs via a webhook, processes each input individually and evaluates sentiment scores returned by the model. The workflow intelligently determines whether the sentiment is Positive, Neutral or Negative based on the highest score and a confidence threshold. It ensures more reliable classification by applying a score validation logic. Once classified, the workflow routes the data accordingly. Each sentiment category is stored in a separate Google Sheets tab, making it easy to track and analyze feedback trends. Additionally, any negative feedback automatically triggers the creation of a Jira ticket, enabling quick issue resolution. Who It's For Businesses collecting customer feedback Product teams monitoring user sentiment Customer support teams SaaS companies handling reviews or complaints Developers building AI-powered automation workflows Requirements To use this workflow, you need: n8n account (self-hosted or cloud) Hugging Face API access token Google Sheets account with service account credentials Jira Software Cloud account Basic understanding of n8n workflows and nodes How It Works & Setup Guide Step 1: Import Workflow Import the JSON file into n8n Step 2: Configure Webhook Node: Receive Feedback Method: POST Endpoint: /sentiment-input Input format: { "data": [ { "text": "I love this" }, { "text": "This is okay" }, { "text": "Worst experience ever" } ] } Step 3: Split Input Data Node: Split Text Items Splits array into individual items for processing Step 4: Rate Limiting Node: Rate Limit Control Prevents API overload (optional delay control) Step 5: Preserve Input Node: Preserve Input Text Keeps original text intact for later use Step 6: Sentiment Analysis Node: Get Sentiment Scores Add Hugging Face API token in headers: Authorization: Bearer YOUR_API_KEY Model used: cardiffnlp/twitter-roberta-base-sentiment Step 7: Merge Data Node: Merge Text & Scores Combines model output with original input Step 8: Compute Sentiment Node: Compute Sentiment Logic: Highest score determines sentiment Confidence threshold: > 0.9 Otherwise defaults to Neutral Step 9: Route Data Node: Route by Sentiment Routes into: Positive Neutral Negative Step 10: Store Results Nodes: Store Positive Feedback Store Neutral Feedback Store Negative Feedback Append data into respective Google Sheets tabs Step 11: Create Jira Ticket Node: Create Jira Ticket Triggered only for Negative sentiment Includes: Text Sentiment Timestamp Priority: High How To Customize Nodes Webhook Node** Change endpoint path as needed HTTP Request Node** Replace Hugging Face model with another model if required Compute Sentiment Node** Adjust confidence threshold (currently 0.9) Modify classification logic Google Sheets Nodes** Change document ID or sheet names Add more columns if needed Jira Node** Customize issue type, priority or project Add-ons You can enhance this workflow with: Email or Slack notifications for negative feedback Dashboard visualization using BI tools Sentiment trend analytics Multi-language sentiment analysis Integration with CRM systems Use Case Examples Customer feedback analysis for apps or websites Product review classification from multiple sources Social media sentiment monitoring Support ticket prioritization system Survey response automation There can be many more use cases depending on how feedback data is collected and used. Troubleshooting Guide | Issue | Possible Cause | Solution | | ---------------------------------- | -------------------------------- | -------------------------------- | | Webhook not triggering | Incorrect endpoint or method | Verify POST request and URL | | No sentiment output | API token missing/invalid | Check Hugging Face API key | | Incorrect sentiment classification | Confidence threshold too high | Adjust threshold in Compute node | | Data not appearing in Sheets | गलत credentials or sheet mapping | Reconnect Google Sheets | | Jira ticket not created | Jira credentials issue | Verify Jira API connection | Need Help? If you need assistance setting up this workflow, customizing nodes or building advanced automation solutions, feel free to reach out to n8n developers at WeblineIndia. Our team can help you: Deploy n8n workflows on cloud/server Customize AI-based automation Integrate APIs and enterprise tools Build scalable business automation systems Contact WeblineIndia for expert support and tailored solutions.

Automate GitLab tag releases to Jira and Slack for Dev and QA

Git Tag → Release Notes → Jira → Slack (Dev + QA) This workflow automatically detects a new GitLab tag, validates the version, fetches commit changes, generates release notes, creates a Jira task and sends notifications to separate Slack channels for Development and QA teams. This workflow starts whenever a new tag such as v1.0.0 is pushed in GitLab. It checks whether the tag format is correct, collects recent commits, prepares release notes, creates a Jira issue for QA testing and sends Slack notifications to Dev and QA teams. You receive: Automatic release process after GitLab tag push** Auto-generated release notes from commit history** Jira task for QA testing** Separate Slack alerts for Dev and QA teams** Ideal for teams that want a clean and automated software release process without manual follow-up. Quick Start – Implementation Steps Import workflow json in your n8n account Add your GitLab webhook URL in repository settings. Add your GitLab API token in HTTP Request node. Connect your Jira Cloud account. Connect your Slack account. Select Dev and QA Slack channels. Activate the workflow. What It Does This workflow automates release management: Detects new GitLab tag push. Validates semantic version format. Fetches commit changes from GitLab. Generates release notes automatically. Creates Jira issue for testing. Sends release update to Dev Slack channel. Sends testing request to QA Slack channel. Returns success or error response. This helps teams release faster with proper communication. Who It's For This workflow is ideal for: Development teams QA teams DevOps engineers Release managers Product teams Companies using GitLab + Jira + Slack Requirements to Use This Workflow To run this workflow, you need: n8n instance (cloud or self-hosted) GitLab repository access** GitLab API token** Jira Cloud account** Slack workspace** Basic understanding of releases and version tags How It Works Tag Push – Workflow starts when GitLab tag is created. Version Check – Validates tag like v1.0.0. Fetch Commits – Gets commit changes from GitLab. Generate Notes – Creates release notes. Create Jira Task – Creates testing ticket. Send Dev Alert – Notifies developers. Send QA Alert – Notifies QA team. Complete Workflow – Sends success response. Setup Steps Import the provided n8n JSON file. Open Webhook node and copy URL. Add webhook in GitLab repository settings. Open HTTP node and add GitLab API URL + Token. Connect Jira Cloud credentials. Select Jira project and issue type. Connect Slack credentials. Select separate Dev and QA channels. Activate workflow. How To Customize Nodes Customize Version Rules Modify the IF node: Allow custom tag formats Add beta or release candidate versions Customize Jira Task You can change: Summary title Priority Assignee Labels Due date Customize Slack Alerts You may add: Emojis Mentions (@channel) Jira link Deployment notes Release owner Customize Release Notes You can include: Commit author names Merge request links Feature list Bug fixes Build details Add-Ons (Optional Enhancements) You can extend this workflow to: Auto-create GitLab Release page Trigger deployment automatically Add email notifications Generate PDF release notes Add approval step before release Send summary to management Track release history in database Use Case Examples Development Release Notify developers instantly after version tag push. QA Testing Flow Automatically create Jira ticket for testing. Sprint Release Use during sprint end releases. Production Release Send official release communication. Multi-Team Coordination Keep Dev, QA and Managers updated. Troubleshooting Guide | Issue | Possible Cause | Solution | |---|---|---| | Workflow not starting | Webhook not added | Recheck GitLab webhook | | Invalid tag error | Wrong version format | Use v1.0.0 | | No commits found | Token/API issue | Check GitLab token | | Jira issue not created | Wrong credentials | Reconnect Jira | | Slack message failed | Invalid Slack auth | Reconnect Slack | | Wrong channel used | Wrong channel ID | Select correct channel | Need Help? If you need help customizing or extending this workflow with features such as auto deployments, approvals, dashboards or enterprise release automation, then our n8n workflow developers at WeblineIndia can help with advanced automation solutions.

Analyze vendor security risk from Jira tickets using Grok, Claude and Slack

How it works When a new vendor ticket is created in Jira, this workflow automatically performs a comprehensive security due-diligence investigation and posts the findings back as a Jira comment plus a Slack notification. A Jira webhook fires when an issue is created. An AI agent (Grok) extracts the vendor company name, URL, and product from the issue fields. A Seed Discovery agent (Claude + Perplexity) finds the vendor's official domains, trust center, privacy policy, and status page URLs — handling domain aliases automatically. Seven specialized research agents run in parallel, each with a focused persona: Compliance, Data Handling, Privacy & Legal, Security Controls, Availability, Pricing, and Company Intel. All use Perplexity sonar-pro-search for live web research. A Sanitizer code node strips unpredictable LLM formatting from all 7 outputs. A Lead Security Analyst agent (Grok) synthesizes all findings into a risk-scored report, generating Jira Wiki Markup and Slack Block Kit JSON simultaneously. The report is posted as a comment on the original Jira ticket, and a rich Slack notification with a "View Report in Jira" button is sent to your security channel. Set up steps OpenRouter** — Create an OpenRouter account and add an API credential in n8n. The workflow uses three models: x-ai/grok-4-fast, anthropic/claude-sonnet-4.5, and perplexity/sonar-pro-search (~10 min) Jira** — Add a Jira credential (API token) and configure a Jira webhook automation to POST to this workflow's webhook URL when an issue is created in your vendor-review project (~10 min) Slack** — Add a Slack credential (OAuth) and set your target channel in the "Send a message" node (~5 min) Jira URL** — In the "AI Agent" node, replace YOUR-JIRA-DOMAIN in the Jira Browser URL with your actual Atlassian domain (~1 min)

Build your own Webhook and Jira Software integration

Create custom Webhook and Jira Software workflows by choosing triggers and actions. Nodes come with global operations and settings, as well as app-specific parameters that can be configured. You can also use the HTTP Request node to query data from any app or service with a REST API.

Jira Software supported actions

Changelog
Get issue changelog
Create
Create a new issue
Delete
Delete an issue
Get
Get an issue
Get Many
Get many issues
Notify
Create an email notification for an issue and add it to the mail queue
Status
Return either all transitions or a transition that can be performed by the user on an issue, based on the issue's status
Update
Update an issue
Add
Add attachment to issue
Get
Get an attachment
Get Many
Get many attachments
Remove
Remove an attachment
Add
Add comment to issue
Get
Get a comment
Get Many
Get many comments
Remove
Remove a comment
Update
Update a comment
Create
Create a new user
Delete
Delete a user
Get
Retrieve a user

Webhook and Jira Software integration details

integrationWebhook node
Webhook

Webhooks are automatic notifications that apps send when something occurs. They are sent to a certain URL, which is effectively the app's phone number or address, and contain a message or payload. Polling is nearly never quicker than webhooks, and it takes less effort from you.

Use case

Save engineering resources

Reduce time spent on customer integrations, engineer faster POCs, keep your customer-specific functionality separate from product all without having to code.

Learn more

FAQs

  • Can Webhook connect with Jira Software?

  • Can I use Webhook’s API with n8n?

  • Can I use Jira Software’s API with n8n?

  • Is n8n secure for integrating Webhook and Jira Software?

  • How to get started with Webhook and Jira Software integration in n8n.io?

Need help setting up your Webhook and Jira Software integration?

Discover our latest community's recommendations and join the discussions about Webhook and Jira Software integration.
Benjamin Hatton
Albert Ashkhatoyan
Víctor González
Salomão
sg tech

Looking to integrate Webhook and Jira Software in your company?

Over 3000 companies switch to n8n every single week

Why use n8n to integrate Webhook with Jira Software

Build complex workflows, really fast

Build complex workflows, really fast

Handle branching, merging and iteration easily.
Pause your workflow to wait for external events.

Code when you need it, UI when you don't

Simple debugging

Your data is displayed alongside your settings, making edge cases easy to track down.

Use templates to get started fast

Use 1000+ workflow templates available from our core team and our community.

Reuse your work

Copy and paste, easily import and export workflows.

Implement complex processes faster with n8n

red iconyellow iconred iconyellow icon